jmtd → log → Broken webcam aspect ratio
Sometimes I have remote meetings with Google Meet. Unlike the other video-conferencing services that I use (Bluejeans, Zoom), my video was stretched out of proportion under Google Meet with Firefox. I haven't found out why this was happening, but I did figure out a work-around.
Thanks to Daniel Silverstone, Rob Kendrick, Gregor Herrmann and Ben Allen for pointing me in the right direction!
Hardware
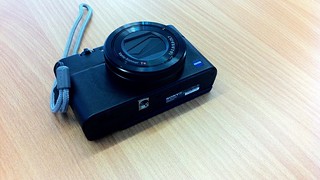
The lovely Sony RX-100 mk3 that I bought in 2015 has spent most of its life languishing unused. During the Pandemic, once I was working from home all the time, I decided to press-gang it into service as a better-quality webcam. Newer models of this camera — the mark 4 onwards — have support for a USB mode called "PC Remote", which effectively makes them into webcams. Unfortunately my mark 3 does not support this, but it does have HDMI out, so I picked up a cheap "HDMI to USB Video Capture Card" from eBay.
Video modes
This device offers a selection of different video modes over a webcam interface. I used qv4l2 to explore the different modes. It became clear that the camera was outputting a signal at 16:9, but the modes on offer from the dongle were for a range of different aspect ratios. The picture for these other ratios was not letter or pillar-boxed, but stretched to fit.
I also noticed that the modes which had the correct aspect ratio were at very low framerates: 1920x1080@5fps, 1360x768@8fps, 1280x720@10fps. It felt to me that I would look unnatural at such a low framerate. The most promising mode was close to the right ratio, 720x480 and 30 fps.
Software
My initial solution is to use the v4l2loopback kernel module, which provides a virtual loop-back webcam interface. I can write video data to it from one process, and read it back from another. Loading it as follows:
modprobe v4l2loopback exclusive_caps=1
The option exclusive_caps configures the module into a mode where it
initially presents a write-only interface, but once a process has opened
a file handle, it then switches to read-only for subsequent processes.
Assuming there are no other camera devices connected at the time of
loading the module, it will create /dev/video0.1
I experimented briefly with OBS Studio, the very versatile and feature-full streaming tool, which confirmed that I could use filters on the source video to fix the aspect ratio, and emit the result to the virtual device. I don't otherwise use OBS, though, so I achieve the same result using ffmpeg:
fmpeg -s 720x480 -i /dev/video1 -r 30 -f v4l2 -vcodec rawvideo \
    -pix_fmt yuyv422 -s 720x405 /dev/video0
The source options are to select the source video mode I want. The
codec and pixel formats are to match what is being emitted (I determined
that using ffprobe on the camera device). The resizing is triggered by
supplying a different size to the -s parameter. I think that is equivalent
to explicitly selecting a "scale" filter, and there might be other filters
that could be used instead (to add pillar boxes for example).
This worked just as well. In Google Meet, I select the Virtual Camera, and Google Meet is presented with only one video mode, in the correct aspect ratio, and no configurable options for it, so it can't misbehave.
Future
I'm planning to automate the loading (and unloading) of the module and starting
the ffmpeg process in response to the real camera device being plugged or
unplugged, using systemd events and services. (I don't leave the camera plugged
in all the time due to some bad USB behaviour I've experienced if I do so.)
If I get that working, I will write a follow-up.
- you can request a specific device name/number with another module option.↩


Comments
You're absolutely right, thanks! I can get 1080p@30 via mjpeg. This incantation seems to be sufficient to request that mode and just blit over to the output stream
Thanks!
I did the udev+systemd auto-start magic not too long ago for an SDR dongle. First you need udev to trigger systemd to synthesise a unit for the device when it appears (and remove it when it disappears); something along these lines:
Then you need your service unit to start/stop automatically, so you want something like this in it:
The
WantedByis what's used when youenablethe unit, which puts a symlink to your service unit in the/etc/systemd/system/sys-subsystem-usb-devices-Realtek_RTL2838UHIDIR_00000001.device.wants/(or your equivalent) directory. When the device appears, it starts your service.The
Afteris mostly needed to prevent being able to start your service unit without the device being present. TheBindsTowill stop your service unit when the device disappears.